|
|
How (and why) to create a template in WordThis article addresses what a template is (and what it is not) and when a template is needed (and when it is not) and provides version-specific instructions for creating one in Word 2003 and above. This article addresses only the mechanics of creating and saving a template. For more about the content you might want to include in a template, see this article. What is a template?In the most general sense, a template is a pattern or model on which something else is based. It might be a shape that you trace around or an outline of suggested content. In Word, however, the word template has a specific technical sense: A Word template is a particular kind of file, with a different file extension from a document (.dot, .dotx, or .dotm instead of .doc, .docx, or .docm). A better way to think of a template is as a collection of tools for creating a specific kind of document. It could be considered an extension of Word’s styles, which are containers for sets of properties. Word provides a variety of styles to format text.
Every document is based on a template. If you don’t choose a different template (that is, if you use the default Blank Document), your document is based on the Normal template (Normal.dot in Word 2003 and earlier, Normal.dotm in Word 2007 and above), which is also the “global” template that stores many of the customizations you make in Word. Earlier versions of Word (including Word 2003) also came with a number of built-in templates, but it was possible to remain unaware of them if you never visited the New dialog where they lived. Starting Word created a new Blank Document, and the New button on the Standard toolbar, by default, also created a new Blank Document. In Word 2013 and above it has become almost impossible not to be aware of the fact that there are other templates available because, by default, Word opens to a Start screen that asks you to choose a template. In Word 2007 and 2010, the default way to create a new document also opens a window or pane featuring a variety of templates or template categories. These templates are expressly designed for specific types of documents: letters, reports, invoices, invitations, flyers, and so on. Increasingly they are stored online (at Office.com), and you must have an Internet connection to access them. What a template is notAlthough many of the templates you can download from Office.com contain sample content, a template is not really about content but about structure and layout. A template is designed to provide specific page layout (page size and orientation, margins, number of columns, and so on) and styles for the types of paragraphs most likely to be used in the given type of document. It may also contain tools to facilitate using the included styles and other features. In Word 2007 and above, these tools may include Building Blocks and a customized Quick Access Toolbar and/or Ribbon. In Word 2003 and earlier, they may also include custom menus and toolbars. In all versions, they may include macros, keyboard shortcuts, and AutoText entries. Some templates do contain boilerplate content: a template for a letter, for example, will perhaps have a letterhead on the first page, page numbering, and perhaps an automatic date field. In addition to custom styles for the parts of a letter (Inside Address, Reference Line, Salutation, Body Text, Closing, Signature, Copy List, and so on), it may have dummy paragraphs or text entry fields indicating where these parts go. In general, however, the content of a document is up to the writer. Users often ask for “templates” for very specific content, such as a letter protesting an unfair dismissal or a letter to customers of a business thanking them for their patronage. You may actually find such samples among those available at Office.com. Viewed from a layout perspective, however, such letters are just letters. They can be created using a generic letter template or from scratch, assuming the writer knows how to write a letter. What the user is really looking for is a model or sample document that would provide suggested wording for such a letter. That is not what a “template” is in Word. On the other hand, users’ needs sometimes are more related to layout: “a Request for Proposal template to hire a building designer for a residence” or “a restaurant evaluation sheet template” or “a flyer template for an AA – Al-Anon Event.” In such cases, finding a readymade template is unlikely, though it may be possible to find a generic template that can be adapted. In the last analysis, however, the user is still looking for a model or sample rather than a template—just something to copy or build on; even a sample document would suffice. When to create a templateThe whole point of a Word template is to create a format that can be used over and over again. Accordingly, it is unnecessary and a waste of time to create a template for a single-use document. Creating a template for letters makes sense; creating a template for a letter protesting one’s unfair dismissal does not. A template for flyers for AA – Al-Anon events may make sense if the events are frequent and the flyers should be consistent in design; if the event is a one-off, a document will suffice. So, before you set out to create a template, you should ask yourself whether it is something you would use repeatedly. Often this realization comes after you’ve recreated the same document format numerous times, changing margins, modifying styles, changing fonts. It occurs to you that you could save time in the creation of such documents if you didn’t have to make all these changes. That’s when you need a template.
In addition to providing one-click access to a combination of document, paragraph, and font formatting, there are advantages to true templates that cannot be achieved with documents used as templates. Although it is now possible to save macros, a customized Quick Access Toolbar (toolbars and menus in earlier versions), and keyboard shortcuts in documents, Building Blocks (AutoText entries in earlier versions) must still be saved in templates. And the New dialog actually makes it easier to access templates than to search for documents. The primary benefit of a template over a reused document, however, is that the default action for a template (if you double-click on it in a Windows Explorer window) is to create a new document (you actually have to go to some trouble to open the template for editing). When you use a document as a “template,” you must remember to Save As to protect the original; if you forget and just save the modified document, you’ve spoiled your “template.” If you create a specific kind of document (such as letters) almost exclusively, your first impulse may be to just make the necessary changes to the Normal template, so that you get a document formatted the way you want when you click the New button. This can be a solution up to a point, but please note the caveats expressed in “How to change the default settings for Word documents.” In particular, it is not a good idea to add a header or footer to the Normal template because this will affect the layout of labels. For this reason it is usually a good idea to leave the Normal template alone (a lot of your settings, such as shortcut key assignments and—in previous versions—custom toolbars, will be stored there anyway, so that they are available to all templates) and make a custom template for each specific task you routinely do. How to create and use a templateThere are basically two ways to create a template. Which one you choose will depend on how you come to the process of creation:
The following sections will describe how to do either of these in various versions of Word. For additional information about where templates are stored and ways of accessing them see “File New in Microsoft Word - Access to User and Workgroup Templates.” Author Charles Kenyon has investigated, far more thoroughly than I have the patience to do, all the ins and outs of template storage in succeeding versions of Word. A note about the screen shotsAll of the screen shots were taken on my own computer, where I have four versions of Word installed. In order to keep these versions separate and relatively happy, I have templates stored in four separate folders: the default Templates folder for Word 2003 and folders named Word 2007 Templates, Word 2010 Templates, and Word 2013 Templates for the respective applications. I also have numerous subfolders of templates, not to mention subfolders of documents, and many of those, as well as my Favorites folders, are on view in many of the screen shots below. Naturally, your dialogs will not look exactly the same, but I have tried to give a decent impression of what you will see if you have file extensions and the Folders pane displayed. Create a template in Word 2003With some minor exceptions, these instructions also apply to Word 2000 and 2002 (yes, some users still have those versions!). Start with an existing documentYou have a document that contains the formatting you want to reuse in subsequent documents.
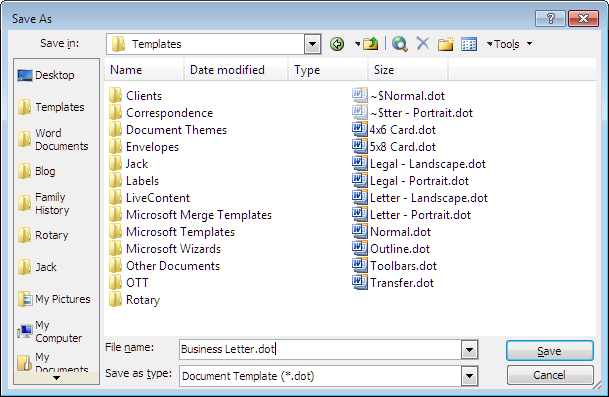
Word 2003 Save As dialog Even before you save the document as a template, you can make many customizations and save them in it. For example, in addition to styles, you can have custom toolbars and keyboard shortcuts, menu and toolbar customizations, macros, etc. After you have saved the document as a template, you can also store AutoText entries in it. Start from scratch*
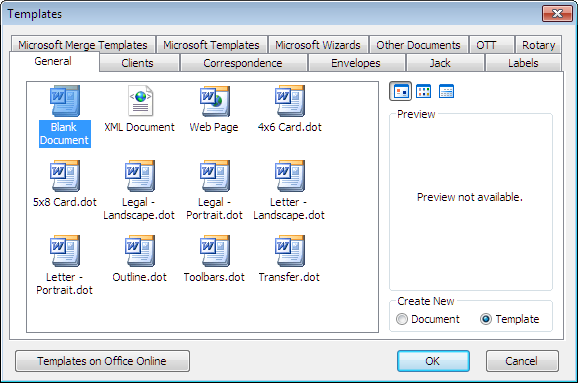
Word 2003 Templates dialog
Using your new templateTo use your new template, you will need to select it in the New dialog or the New Document task pane. I said above that the New Document task pane is a time-waster. Although your new template may appear (for a while, at least) under “Recently used templates,” you still need two mouse clicks (or Alt+F, N) to open the task pane and then another click to choose your template or, worse still, click On my computer… to get to the Templates dialog. Here’s how to get to that dialog in one click (for a more complete discussion of shortcuts to the New dialog, see this specific section of Charles Kenyon’s article on File New Variations):
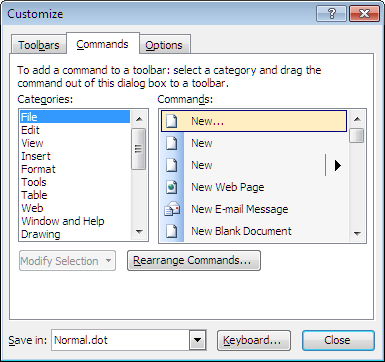
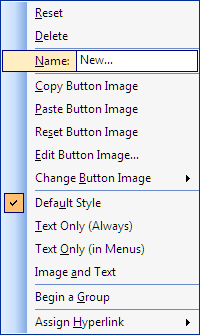
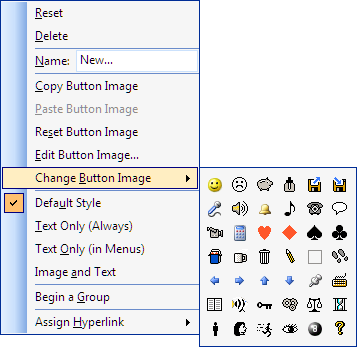
Word 2003 Customize dialog showing New... button You may already have a button on the Standard toolbar labeled New that opens a new Blank Document (this button does not appear on the Standard toolbar by default, but you may have added it from the Add or Remove Buttons dropdown, where it is listed as New Blank Document). The ScreenTip of the New… button will also be New. To prevent confusion, you can:
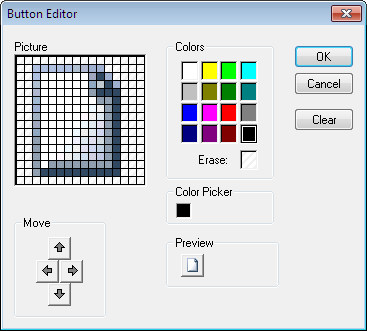
Button Editor in Word 2003
Create a template in Word 2007Start with an existing documentYou have a document that contains the formatting you want to reuse in subsequent documents.
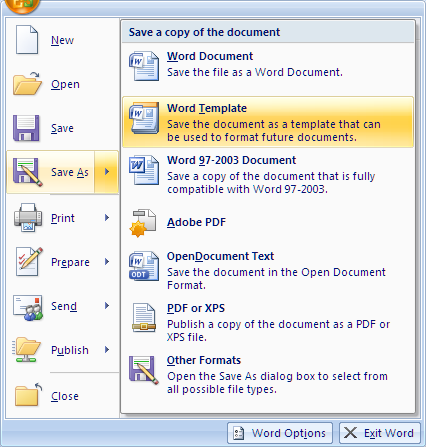
Word 2007 Office Button menu showing Save As | Template
Save As dialog in Word 2007
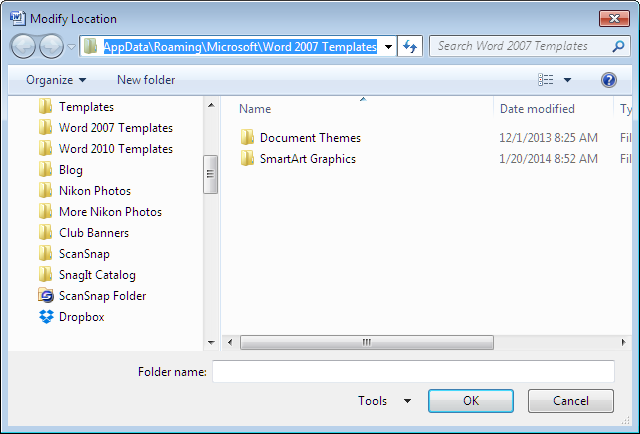
Unlike Word 2003, Word 2007 will not automatically change the save location to the folder where templates are stored; you must navigate to this folder manually (note that the screen shot above shows the Word Documents folder). To find the location of this folder, go to Office Button | Word Options | Advanced. At the bottom of this tab, click File Locations…. and look at the path given for “User templates.” If you haven’t changed it, this will be the Templates folder, which is where the Normal template is also stored. You won’t be able to see the full path to this folder, but you can get it this way:
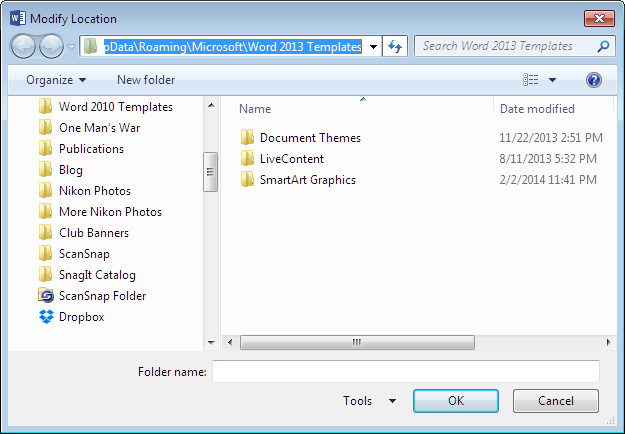
Modify Location dialog in Word 2007
Even before you save the document as a template, you can make many customizations and save them in it. For example, in addition to styles, you can have a custom Quick Access Toolbar and keyboard shortcuts, macros (if it is a .docm), etc. After you have saved the document as a template, you can also store Building Blocks and AutoText entries in it. Start from scratch*You may at first believe that there is no way to create a new template from scratch. When you click the Office Button and then New, you are not offered a choice of document or template, and the New Document window that opens seems to offer only the option of creating a new document based on an existing template (New from existing… creates a new document based on an existing document). There is a way: If you click on My templates…, you will get the legacy New dialog with Blank Document selected, but there is a more efficient way to open this dialog:
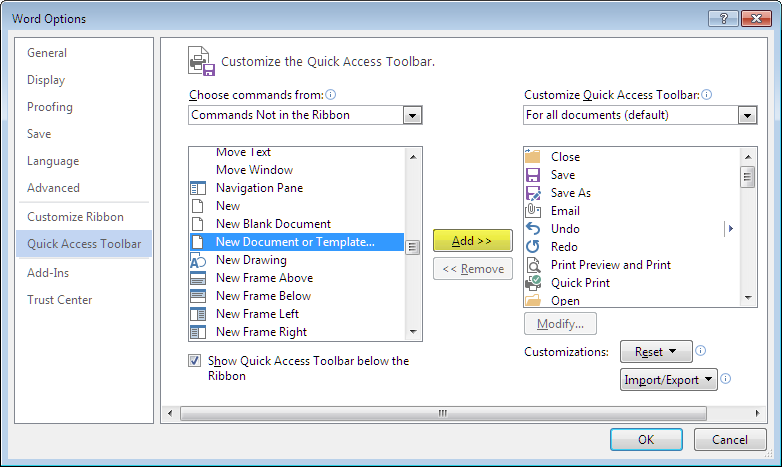
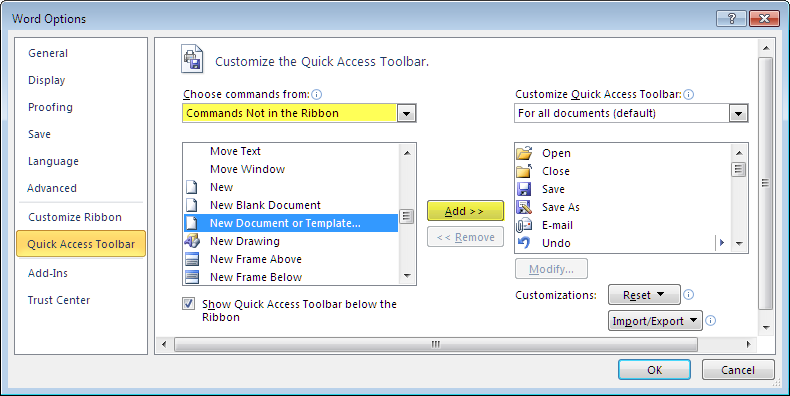
Customize the Quick Access Toolbar dialog in Word 2007 If you already have the New button (which opens the New Document window) or the New Blank Document button (which creates a new blank document), you will notice that the button icon is the same for all three (the ToolTip you get when you hover the mouse over them is different, however). Since Word 2007 doesn’t allow you to customize button images, you may want to space these apart on your QAT so you can distinguish them. For a more complete discussion of shortcuts to the New dialog, see this specific section of Charles Kenyon’s article on File New Variations.
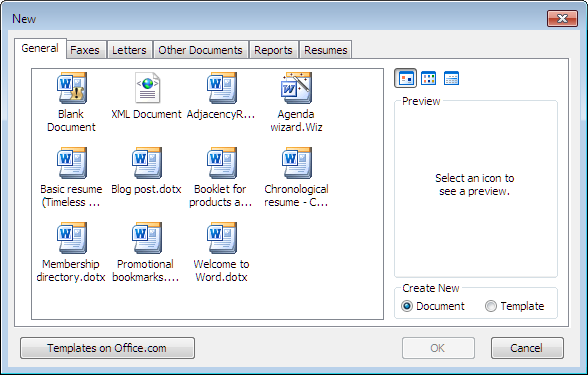
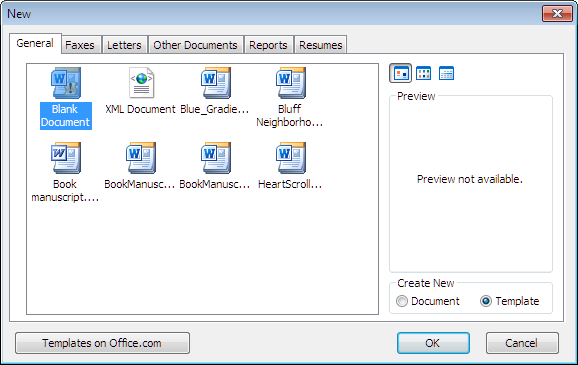
New dialog in Word 2007
When you go to save the template, you’ll see that Word defaults to the folder where templates are stored. This is one good reason for starting from scratch with a template instead of a document. Using your new templateIf you click New on the Office Button menu, you may see your template under Recently Used Templates in the New Document dialog. If not, you can click My templates… to open the classic New dialog. But there is an easier way:
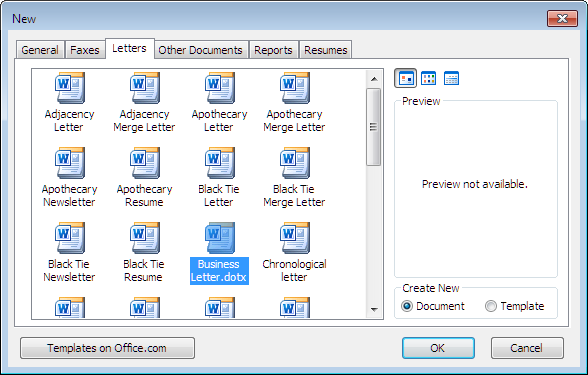
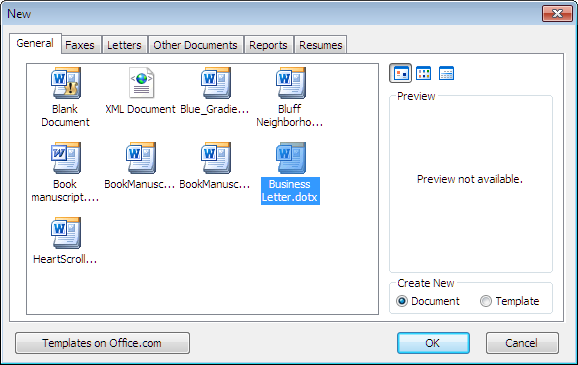
New dialog in Word 2007 showing Business Letter
If you create many templates, you may want to categorize them. You can do this by creating subfolders in the Templates folder. The root folder appears as the default General tab in the New dialog, and each subfolder (such as Letters or Reports) will appear as another tab. Important Note: If you open the New dialog from the My templates… link in the Office Button | New dialog, you will see only the templates and folders you have created. Word’s built-in templates are accessible from the Installed Templates link. If you open the New dialog using the New Document or Template button you have added, you will see both your personal and Word’s installed templates in the same dialog. The installed templates are on tabs labeled Faxes, Letters, Other Documents, Reports, and Resumes. If you create a subfolder with the same name as one of these tabs, such as Letters, and store your template there, it will be displayed along with Word’s templates in this dialog. You can distinguish your templates because, unlike Word’s native templates, they will display the .dotx or .dotm file extension (if you have file extensions displayed in Windows, which is recommended).
Word 2007 New dialog showing Letters tab Create a template in Word 2010Start with an existing documentYou have a document that contains the formatting you want to reuse in subsequent documents.
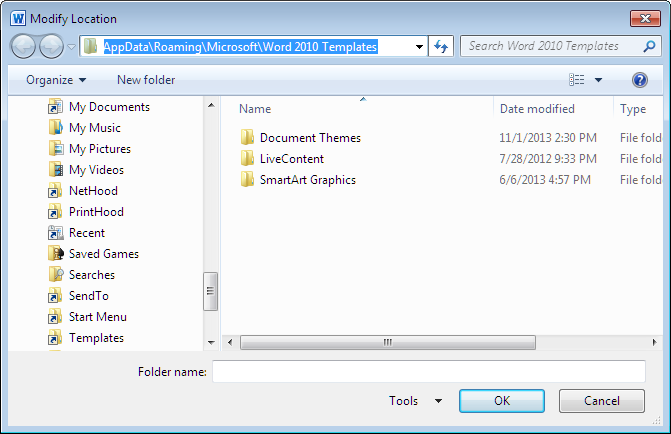
Word 2010 Save As dialog (template) Important Note: If your template will contain macros, instead choose Word Macro-Enabled Template (*.dotm). Warning: If the document you want to save as a template already contains macros, it will have been saved as a Word Macro-Enabled Document (*.docm). Despite this, when you go to save it as a template, Word will default to the .dotx format, which will not preserve your macros. Unlike Word 2003, Word 2010 will not automatically change the save location to the folder where templates are stored; you must navigate to this folder manually. To find the location of this folder, go to File | Options | Advanced. At the bottom of this tab, click File Locations…. and look at the path given for “User templates.” If you haven’t changed it, this will be the Templates folder, which is where the Normal template is also stored. You won’t be able to see the full path to this folder, but you can get it this way:
Word 2010 Modify Location dialog
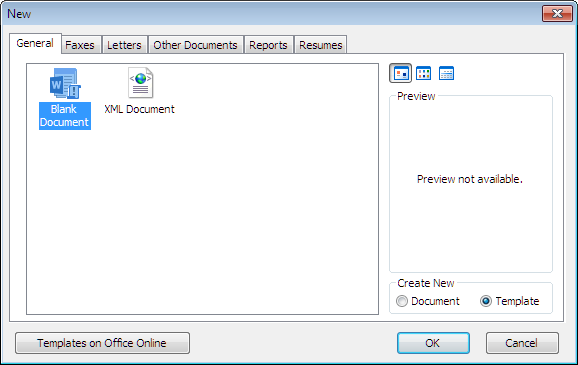
Even before you save the document as a template, you can make many customizations and save them in it. For example, in addition to styles, you can have a custom Quick Access Toolbar and keyboard shortcuts, macros (if it is a .docm), etc. After you have saved the document as a template, you can also store Building Blocks and AutoText entries in it. Start from scratch*You may at first believe that there is no way to create a new template from scratch. When you click the File tab and then New, you are offered only a choice of Available Templates, along with the option of creating a new document based on an existing template (New from existing creates a new document based on an existing document). There is a way: If you click on My templates. you will get the legacy New dialog (here called Personal Templates) with Blank Document selected, but there is an easier way to get to that dialog.
Word 2010 Customize QAT dialog If you already have the New button (which opens the New Document window) or the New Blank Document button (which creates a new blank document), you will notice that the button icon is the same for all three (the ToolTip you get when you hover the mouse over them is different, however). Since Word 2010 doesn’t allow you to customize button images, you may want to space these apart on your QAT so you can distinguish them. For a more complete discussion of shortcuts to the New dialog, see this specific section of Charles Kenyon’s article on File New Variations.
Word 2010 New dialog
When you go to save the template, you’ll see that Word does default to the folder where templates are stored. This is one good reason for starting from scratch with a template instead of a document.
Word 2010 Save As dialog defaulting to Templates folder Using your new templateIf you open the New tab of the Backstage, you will see that, even if you have used it recently, your template will not be in the Available Templates window; you would have to click Recent templates or select My templates to get to the legacy New dialog. Fortunately, there is an easier way!
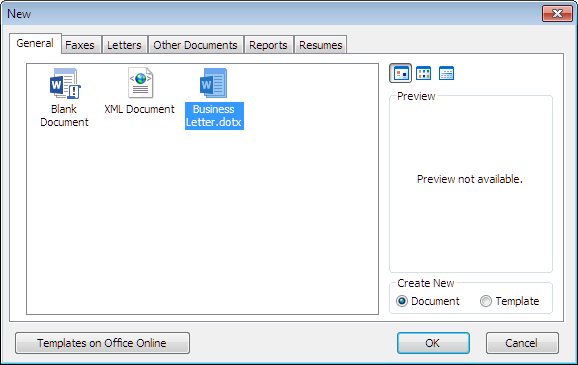
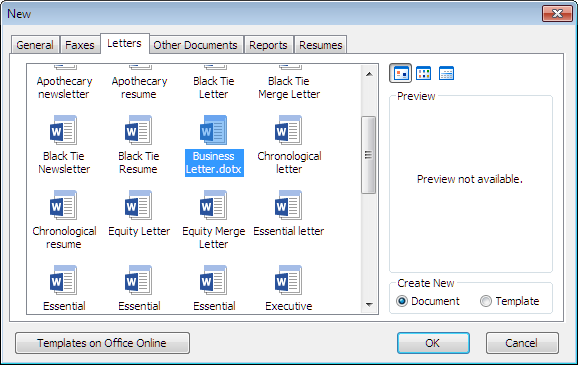
Word 2010 New dialog showing Business Letter template If you create many templates, you may want to categorize them. You can do this by creating subfolders in the Templates folder. The root folder appears as the default Personal Templates tab of the New dialog, and each subfolder (such as Letters or Reports) will appear as another tab. Important Note: If you open the New dialog from the My templates link in the File | New dialog, you will see only the templates and folders you have created. Word’s built-in templates are accessible from the Sample Templates link. If you open the New dialog using the New Document or Template button you have added, you will see both your personal and Word’s installed templates in the same dialog. The installed templates are on tabs labeled Faxes, Letters, Other Documents, Reports, and Resumes. If you create a subfolder with the same name as one of these tabs, such as Letters, and store your template there, it will be displayed along with Word’s templates in this dialog. You can distinguish your templates because, unlike Word’s native templates, they will display the .dotx or .dotm file extension (if you have file extensions displayed in Windows, which is recommended).
Word 2010 New dialog showing Letters tab Create a template in Word 2013 and aboveStart with an existing documentYou have a document that contains the formatting you want to reuse in subsequent documents.
Word 2013 Save As dialog for a template (.dotx) Important Note: If your template will contain macros, instead choose Word Macro-Enabled Template (*.dotm). Warning: If the document you want to save as a template already contains macros, it will have been saved as a Word Macro-Enabled Document (*.docm). Despite this, when you go to save it as a template, Word will default to the .dotx format, which will not preserve your macros.
Even before you save the document as a template, you can make many customizations and save them in it. For example, in addition to styles, you can have a custom Quick Access Toolbar and keyboard shortcuts, macros (if it is a .docm), etc. After you have saved the document as a template, you can also store Building Blocks and AutoText entries in it. Start from scratch*Recent versions of Word seem to be determined to discourage users from even using their own templates, much less creating one from scratch. Probably the easiest way to create one in Word 2013 and above is to start with a Blank Document based on the Normal template and save it as a template as described above, then add the desired elements. If you really want to start with a template, you will have to get access to the classic New dialog. Here’s how:
Word 2013 Customize QAT dialog If you already have the New button (which opens the New Document window) or the New Blank Document button (which creates a new blank document), you will notice that the button icon is the same for all three. Since Word 2013 and 2016 don’t allow you to customize button images, you may want to space these apart on your QAT so you can distinguish them (the tooltips will be different). For a more complete discussion of shortcuts to the New dialog, see this specific section of Charles Kenyon’s article on File New Variations. Once you have access to the New Document or Template dialog:
Word 2013 New dialog
When you go to save the template, you’ll see that Word defaults to the folder where templates are stored. By default, however, this will be the Custom Office Templates folder, which is different from the Templates folder where the Normal template is stored. The Templates folder (with its subfolders) is the one that will be displayed by the New Document or Template dialog. To clarify: As described in this wiki article, when you select the New tab in the Backstage, you will see a selection of templates from Office Online. If you have defined a “Default personal templates location,” these templates will be described as “Featured,” and there will also be a button for “Personal.” If you click on Personal, you will see the templates you saved in the “Default personal templates location” (which is the Custom Office Templates folder by default). If you open the New Document or Template dialog, however, it will not show templates that are saved in the Custom Office Templates folder. It will display templates (including Normal.dotm) that are stored in the folder designated for “User templates,” which is also where the Normal template is stored. In order to be able to save your new template in the default save location and find it again using the New Document or Template dialog, you will need to change the folder where Word saves your templates to make it the same as the folder designated for “User templates.”
Word 2013 Modify Location dialog Using your new templateTo use your new template, you have two choices (provided you have changed the “Default personal templates location” to be the same as the “User templates” folder):
If you create many templates, you may want to categorize them. You can do this by creating subfolders in the folder where templates are stored. In the New dialog, the root folder appears as the default General tab, and each subfolder (such as Letters or Reports) will appear as another tab.
Word 2013 New dialog showing Business Letter template In the Backstage, when you click Personal (or Custom) on the New tab, you will see each subfolder as a folder, followed by thumbnails for the templates that are in the root folder. If you have many subfolders and/or many templates in the root folder, this makes for a very long page, requiring scrolling both the page and the tab (separately). The New dialog is much more efficient.† Note: I am indebted to Fellow Word MVP Jay Freedman, who read an early draft of this article and provided many helpful suggestions. *In all versions of Word, the most efficient (and a very common) way to create a template “from scratch” is to start with a new Blank Document and immediately save it as a template as described for starting with an existing document. You probably don’t lose any functionality by starting this way; the main advantage of starting with a template is that Word defaults to the folder where templates are stored. †If you have set the “Default personal templates location” to be the same as the “User templates” location, you will see both the templates you create and the Microsoft-supplied templates you have downloaded and installed (shown on the Personal or Custom tab of File | New). If you have also defined a location (in the File Locations dialog) for “Workgroup templates,” these will also be displayed in the New dialog; at File | New (Custom tab), you would have to select them separately. This article copyright © 2015, 2023 by Suzanne S. Barnhill, based on an earlier article at the Word MVP site. |
.png)

.png)

.png)