|
|
How to add a command or macro to a menuThis article is for Word 2003 and earlier. The techniques described below are not available in Ribbon versions (Word 2007 and above). How menus workWord 2000 introduced “adaptive menus,” which are also standard in Word 2002 and 2003. To reduce the complexity of menus, Microsoft put only the most commonly used items on the menu; as you work, Word remembers which commands you have used most often and keeps them on (or adds them to) the menu that it displays. All of the menu items are still there, and you can see them if you click the double arrows at the bottom of a menu to expand it to its full extent.
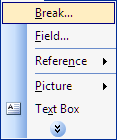
The default Insert menu in Word 2003
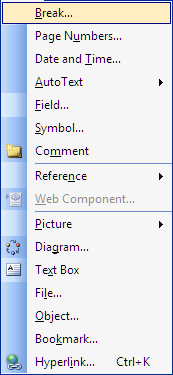
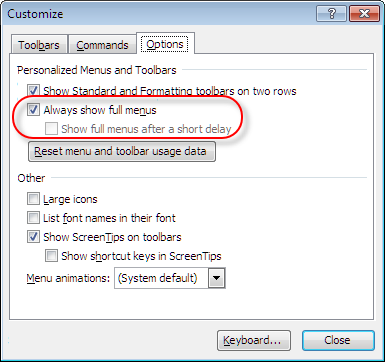
The expanded Insert menu in Word 2003 Alternatively, you can choose to have the full menu open after a short delay, or you can choose to always show full menus. These settings are in the Customize dialog. There are several ways to access this dialog:
In the dialog, select the Options tab and select your preferences for menu display. I personally prefer always to see the entire menu.
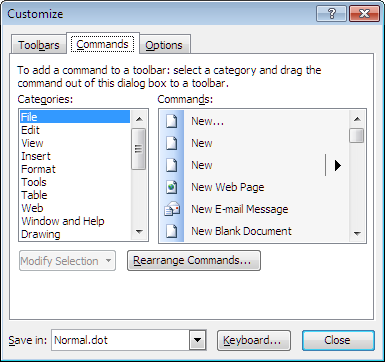
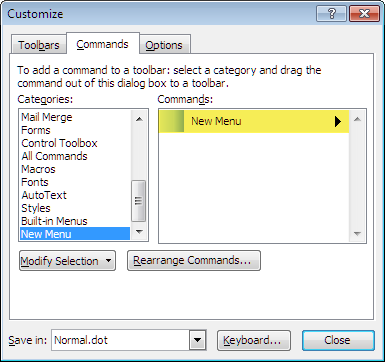
The Customize dialogThe Customize dialog has three tabs. You’ve already seen the Options tab, and we’ll get to the Toolbars tab later when we discuss shortcut menus. For now, you want to select the Commands tab.
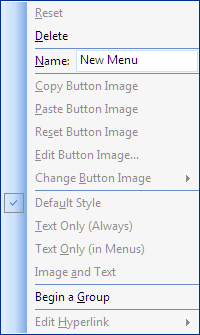
Before we get started, though, let’s talk about where you will save your customizations. Customization contextBy default, any customization you make to a menu (or any custom menu, which we’ll get to in a minute) is saved in the global template, Normal.dot. Because this template is available to all documents (even if a specific document template is attached to the document), your customizations will be available in all documents. But you may want to add customizations (especially a custom menu) to just a specific document template or even a specific document or to a different global template. If you are working in a blank document based on the Normal template, the options available in the Save in dropdown will be limited to Normal.dot and the current document. If you are working in a document based on a different template, that template will also be one of the choices. If you are working in a template, that template will be available. Because the recommended solution to many problems in Word is to rename the Normal template (thus potentially losing customizations), it is often recommended that these customizations be made in another template. If you save that template in Word’s Startup folder, it will be loaded at startup and will be “global” as well, meaning that your customizations will be available to all documents. To save customizations in this global “add-in” template, you must first create and save the template, then open the Customize dialog, select the template in the Save in dropdown, and then make your customizations. Whenever you need to make more customizations to this global template, you must open it for editing. How to add a command to a menuYou can see that the Categories list on the Commands tab reflects the menu structure of Word. But if you scroll down, you will find additional commands that are on various toolbars, as well as AutoText, Styles, Fonts, etc. If you can’t find a command you need in one of the other categories, look in All Commands, which lists every available command. Although they are listed alphabetically, you may have to use some ingenuity to find them because some, such as EditFind, are listed by the menu on which they appear; others, such as DrawCallout, are listed by the toolbar on which they can be found. When you find the command you want, just select it with the mouse and drag it to the menu where you want it to appear. When you hover over the menu name, the menu will open; drag the command to the place where you want it on the menu and drop it. If the command you selected had an icon, that icon will appear to the left of the menu command; otherwise, the button will display text only. Although you can can add a premade icon or design your own (for instructions, see my article on customizing toolbars), text alone is usually fine for a menu item. Creating a new menuThere may be commands that you use only in certain types of documents; you can create a menu that you save in the template for those documents, and it won’t appear in other documents. To create a new menu:
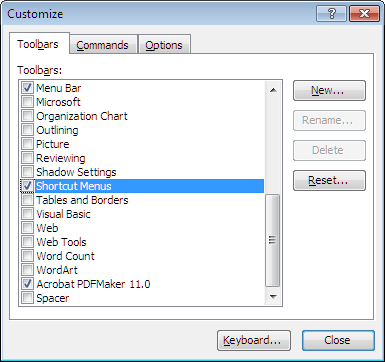
When you have created the menu, you can start adding menu items by dragging them from the Commands list to the menu and dropping them. When you have added all the items you want, close the Customize dialog. When you are working in a document based on the template in which you saved the toolbar, this menu will be displayed. Adding items to shortcut menusMany of Word’s commands are available on a shortcut menu when you right-click in the document. These are called “context menus” because the menu you get depends on whether you click in ordinary body text, in a table, in a misspelled word, etc. Adding items to these menus works the same as adding items to the main menus, but first you have to display them.
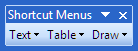
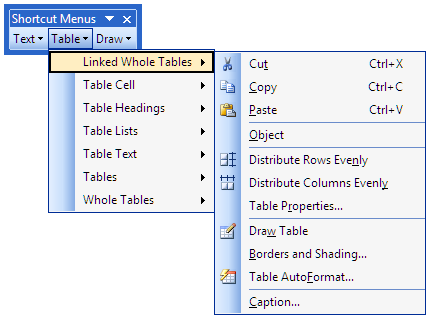
You may be surprised by how many menus you actually have to customize. Remember, they are context-sensitive, and there are a lot of contexts! If you want to add a command to the shortcut menus in tables, for example, you may well need to customize every one of the menus shown in the list. (This is actually a short list; there are 15 menus on the Draw list and 40 on the Text list!)
A shortcut for adding commands to more than one menu is to add the command to just one of the menus, then press Ctrl while dragging it to copy it from one menu to another. This is especially useful in the case of macros, where you may have had to customize the name of the item and its ScreenTip. Related articlesHow to add a command or macro to a toolbar (Word 2003 and earlier) How to add a command or macro to the Quick Access Toolbar (Word 2007 and above) How to assign a keyboard shortcut to a command or macro (all versions) This article copyright © 2016 by Suzanne S. Barnhill. |